Installing Python and Pycharm (on Windows)
Posted on October 24, 2021 in Getting Started
In this article, I will cover how to get started, and the tools you'll need to follow the rest of my posts. I will be making a few assumptions here and in the rest of my articles.
- You are using a Windows PC (if they're making you use Excel on Mac, my condolences)
- You don't know anything about Python or code editors
If either of these aren't true, you may need to do some side research or pick your own editor.
Installing Python
Visit python.org/downloads and download Python version 3.9.7.
The download link you are looking for is either Windows Installer (32-bit) or Windows Installer (64-bit). Pick the one which matches your computer (most likely 64-bit).
Tip
On Windows 10 to determine whether your computer is 32 or 64 bit, hit your Windows key and type in "System Information" and hit enter. This will show you a screen with many details. The row you are looking for is called "System Type" if this says "x64-based PC", you have a 64-bit computer.
Warning
At the time of this article, the latest version is Python 3.10.0. However, we will be using packages in later posts which are not currently working on Python 3.10.0. Proceeding with 3.10.0 may result in unwanted errors.
Once the installer has completed downloading you should be able to double-click on the installer and click next through the installer until it is installed. There will be a few options and checkboxes that you can check when installing, but you should be fine just leaving them at their default values.
Installing PyCharm
Visit jetbrains.com/pycharm/download and download the PyCharm Community edition. PyCharm Community is a free IDE which makes working with Python on Windows significantly easier than it would be otherwise. IDE stands for Integrated Development Environment, which means that it comes built in with a lot of different features which make writing code easier.
Note
Python can be written on any text editor, Notepad, Wordpad, Sublime, etc. There are also many other options of different IDE's such as VS Code that support Python. Once you are comfortable with Python, I would highly encourage you to research and try out different editors. Until then, I would suggest (and will assume) you follow along with my recommendation of using Pycharm Community Edition.
When Pycharm is finished downloading, run the downloaded file and follow the installation prompts. There shouldn't be anything that you need to change, however if it prompts you for what theme to use, I suggest using the "Darcula" theme as it's dark and tends to be easier on the eyes.
Using Pycharm
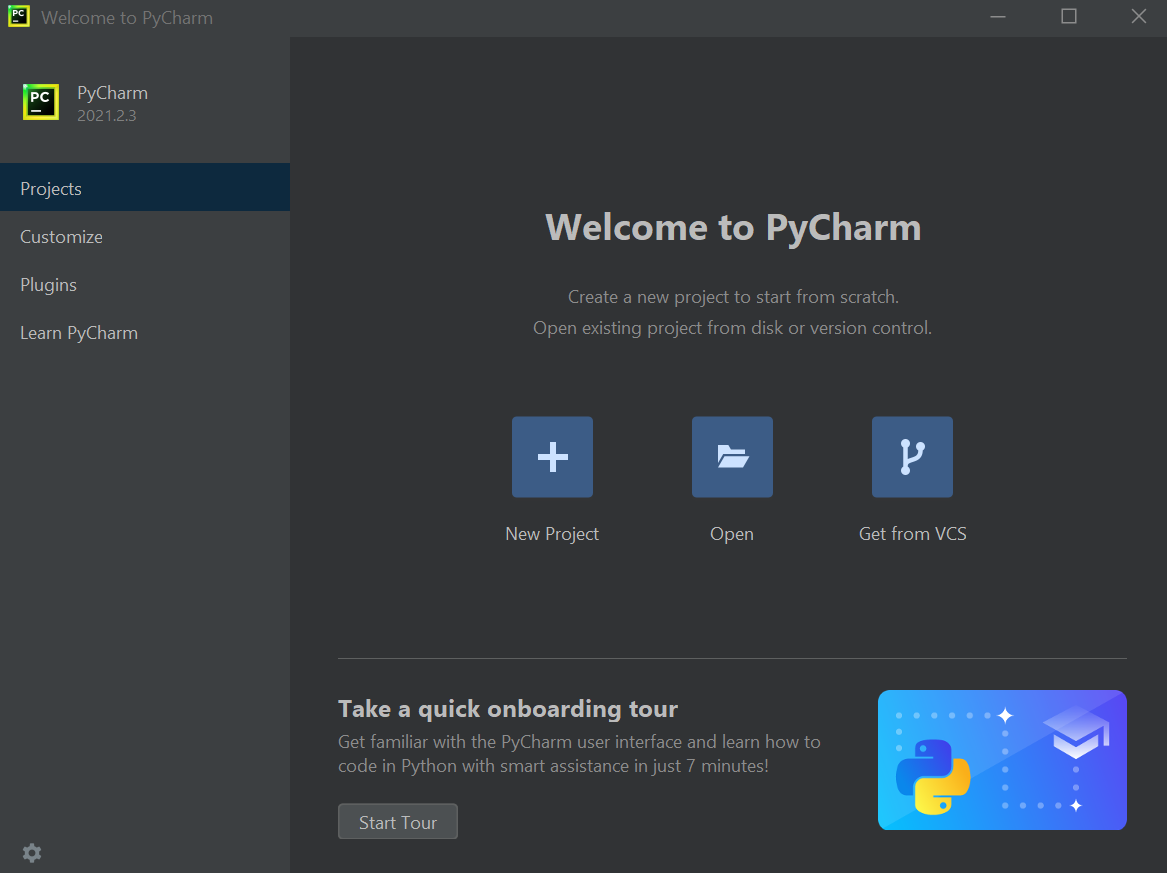
As mentioned above, there are many many features that come built into Pycharm. We will not be covering all of these features but there are a few which are important for basic use. Once you have PyCharm installed, go ahead and open it. You should be greeted with the below screen.

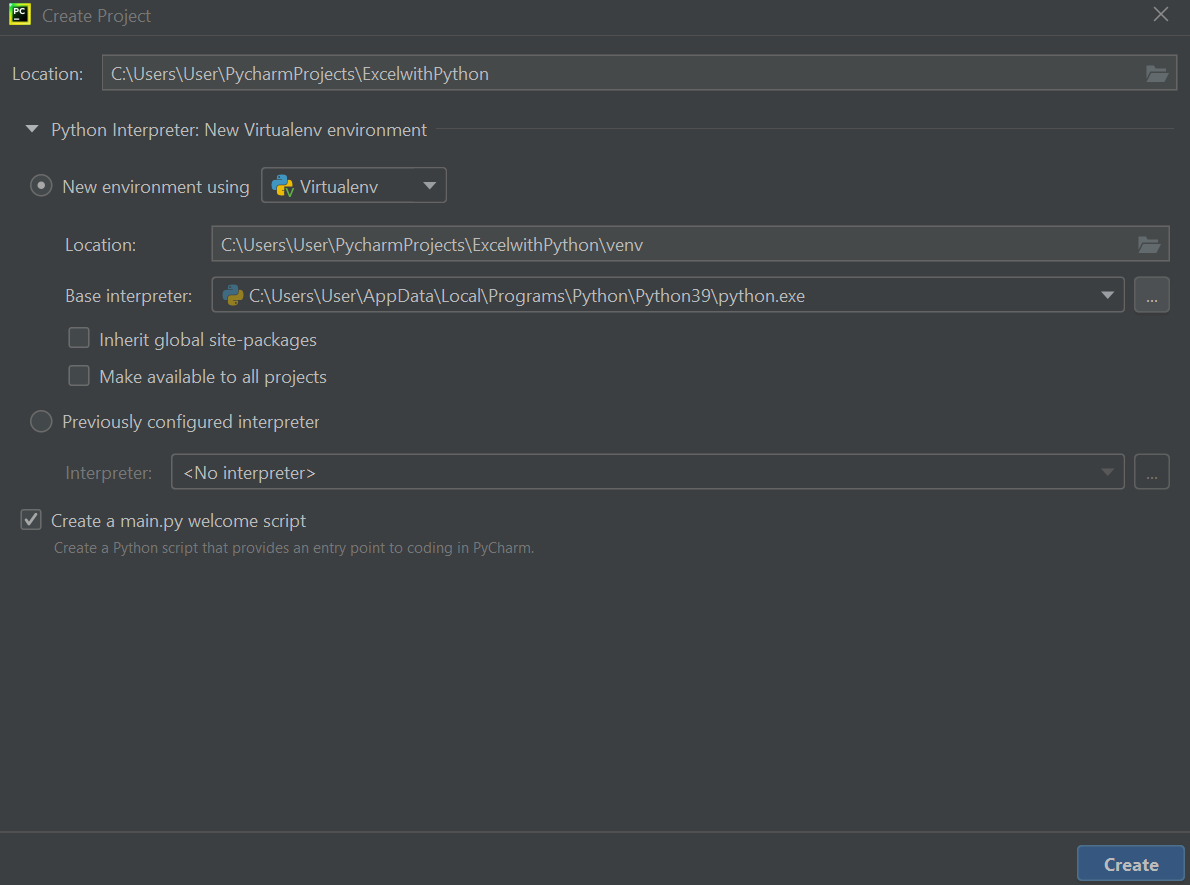
Once you are at this screen, go ahead and select New Project and create a new project called ExcelwithPython. Make sure the "Create a main.py welcome script" option is selected.

Project Management
One of my favorite Pycharm features is its project management. When you create a new project in Pycharm, it automatically creates a new folder with the project name, and activates a virtual environment within that folder.
Important
A virtual environment is a self-contained working copy of Python. Virtual environments are important as different projects can have different requirements, both in the version of Python as well as the version of Python packages that you install. We will get more into Python packages in a later post. As a beginner, the most important thing to remember about projects and virtual environments is that each new project will be a blank slate with no packages installed.
Sample Python Script
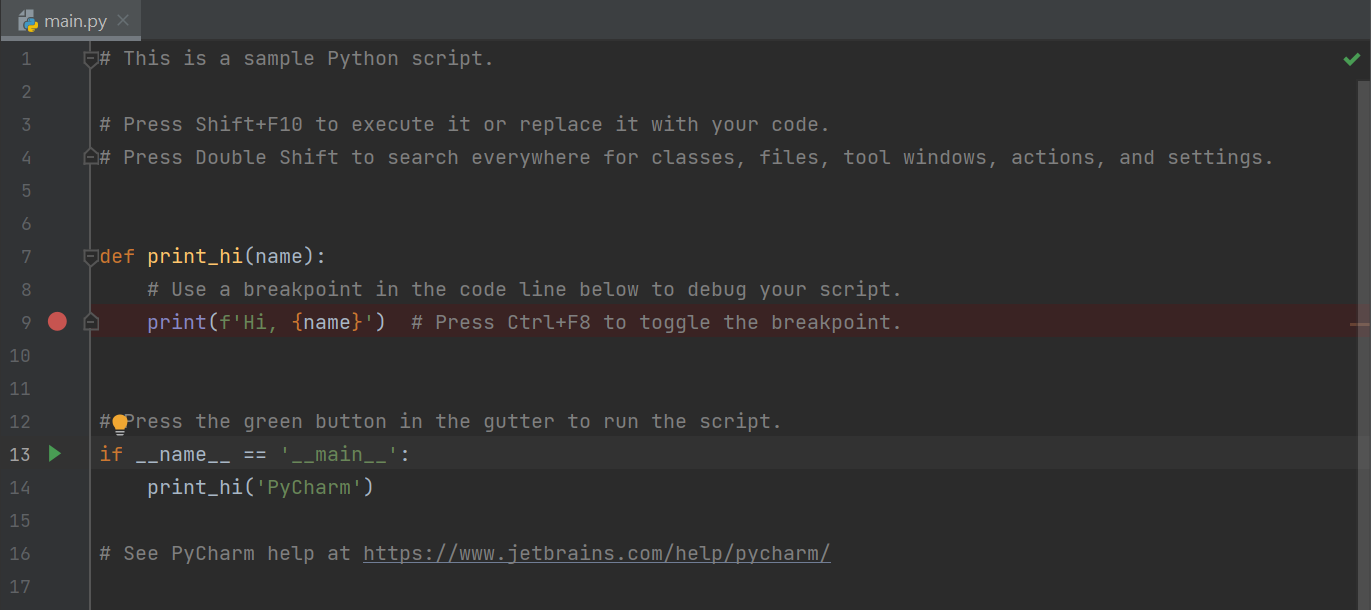
Once the project has finished being created, Pycharm will automatically open up the sample script it created.

To verify everything is set up correctly, click on the green run icon, and select "Run 'main'". A new window will pop up on the bottom of Pycharm with output of the script.

If you see the above output, then you have successfully installed Python and Pycharm! Congrats! Now that everything is working, try changing the string on line 14 from 'PyCharm' to anything else and run it again.
Tip
If you have any issues getting either Python or PyCharm installed, make sure to take note of any error messages you see. Your first step with any errors, not just here but throughout your Python journey, is to Google it. Second step is to Google it again but with in a slightly different way. If all else fails, you can ask me or post a question to the many forums that exist on the internet.
Breaking the Sample Script down
Let's break down the components of the sample script. These concepts will be covered more in future articles, so don't worry if you don't fully understand quite yet.
# This is a sample Python script.

# Press Shift+F10 to execute it or replace it with your code.
# Press Double Shift to search everywhere for classes, files, tool windows, actions, and settings.
These first 3 lines do not contain any actual code. What you are seeing here are called comments,
which are written by placing the hastag (#) symbol in front of the text you want to comment
out.
Note
When you execute Python code, the Python interpreter is reading your code line by line and performing the actions which you have specified. By commenting out a line or lines, you are letting the Python interpreter know that it can skip that particular line (even if it has otherwise valid python code after it).
Comments are incredibly powerful when you start getting into writing code. Writing good comments can save you a lot of time if you have to come back to code that you wrote a few months ago, or if someone else has to read your code.
Tip
Write comments that explain the why behind your code (if not immediately obvious) and not the what. The why is the part that is generally the hardest to remember months down the road. Always strive to write code where the what is easy to understand and follow. More on this in future articles.
def print_hi(name):
    # Use a breakpoint in the code line below to debug your script.
    print(f'Hi, {name}')  # Press Ctrl+F8 to toggle the breakpoint.
The next few lines are defining a function called print_hi. Functions are defined using the
def keyword followed by the function name and parameter(s). In this case, the function
is called print_hi and takes one parameter called name. This function takes anything
provided in the name parameter and prints it out with "Hi, " prepended.
Tip
One way to think about functions and parameters is in comparison to Excel. The formula =SUM()
is function that takes one or more numbers and adds them together. The formula =DATEVALUE()
has one parameter date_text and converts dates written as text into an Excel date code.
Except here we are defining our own custom functions and can control what the inputs and
outputs are.
# Press the green button in the gutter to run the script.
if __name__ == '__main__':
    print_hi("PyCharm")
Assuming it is being run directly, it continues to call the function that was defined print_hi
with the argument PyCharm.
Final note: Whitespace matters in Python
Every programming language has different syntax and rules. Python is no different. In
Python, whitespace matters. Notice how the line after def print_hi(name): is indented.
This is required syntax by Python after a function definition.
Good
# Valid Python
def print_hi(name):
    print(f'Hi, {name}')
Bad
# Invalid Python
def print_hi(name):
print(f'Hi, {name}')
There are various other scenarios where indentation is required Python. Luckily, one of the many great features of Pycharm is that it will automatically recognize these scenarios and do the indentation for you! Understanding when and where indentation is required will be covered more in future articles and will become more intuitive the more experience you get.
Have questions, comments, or feedback? Contact me